SHOW ME THE DATA!
I recently created the blog you’re on right now. In that process, I set up Google Analytics in my config.toml file for my Hugo site. Upon releasing my recent tutorial on creating a Hugo blog on Azure App Services using VSTS and continuous deployment, I decided to go take a look at my Google Analytics account to see if I was getting any traffic.
I immediately noticed it had not logged a single user/view on my blog.

This can’t be right! I’ve been sharing my posts to friends asking for feedback. Even my own testing should have logged something! That’s when I found out about Internal Templates on Hugo.
What is an Internal Template on Hugo?
An internal template on Hugo is a super standard template for some very common use cases on static websites. For example, using Google Analytics to track your site’s traffic information is a relatively common thing to configure on a website. Some other examples of things that are built into Hugo via internal templates are Disqus comments, Google News, and Twitter Cards. I’ll look into adding some more of these soon, but for now we’ll look at what it takes to get my Google Analytics account working.
Before we get started…
There are a few things you’re going to need to have set up prior to going through this tutorial. You will need:
A Google Analytics Account
- You can set up an account here if you don’t already have one.
A Hugo site that you need to configure Google Analytics on.
This site should already be running with a theme.
You can follow my tutorial on creating a Hugo blog on Azure App Services using VSTS and continuous deployment if you’d like to set up a FREE site on Azure App Services for testing this out.
Now that we have that out of the way, let’s get Google Analytics set up properly!
Tutorial start - Configure Google Analytics
Step 1: Adding Your Site to Google Analytics
You’ll need to make sure you have a Google Analytics tracking ID for your site. To do that, let’s step through the setup. We’ll assume you’re already logged into https://analytics.google.com. I’m going to create a new Account and Property under my Google Analytics account for the purposes of this tutorial. Feel free to use an Account and/or Property that already exists if you’d like to do so.
NOTE: Being I already have Accounts and Properties configured under my Google
Analytics account, your view may be slightly different. If you already have an Account
and Property configured, navigate to it to find your tracking ID.
Click on
ADMINin the bottom left-hand corner of your dashboard.On my dashboard, this is on the left navigation bar at the bottom just below
DISCOVER.Navigating to the
ADMINsection may differ for you depending on what state your Google Analytics account is in and how it’s configured.
In the
ADMINdashboard, clickCreate Accountat the top left.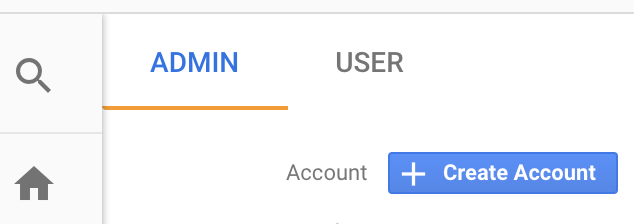
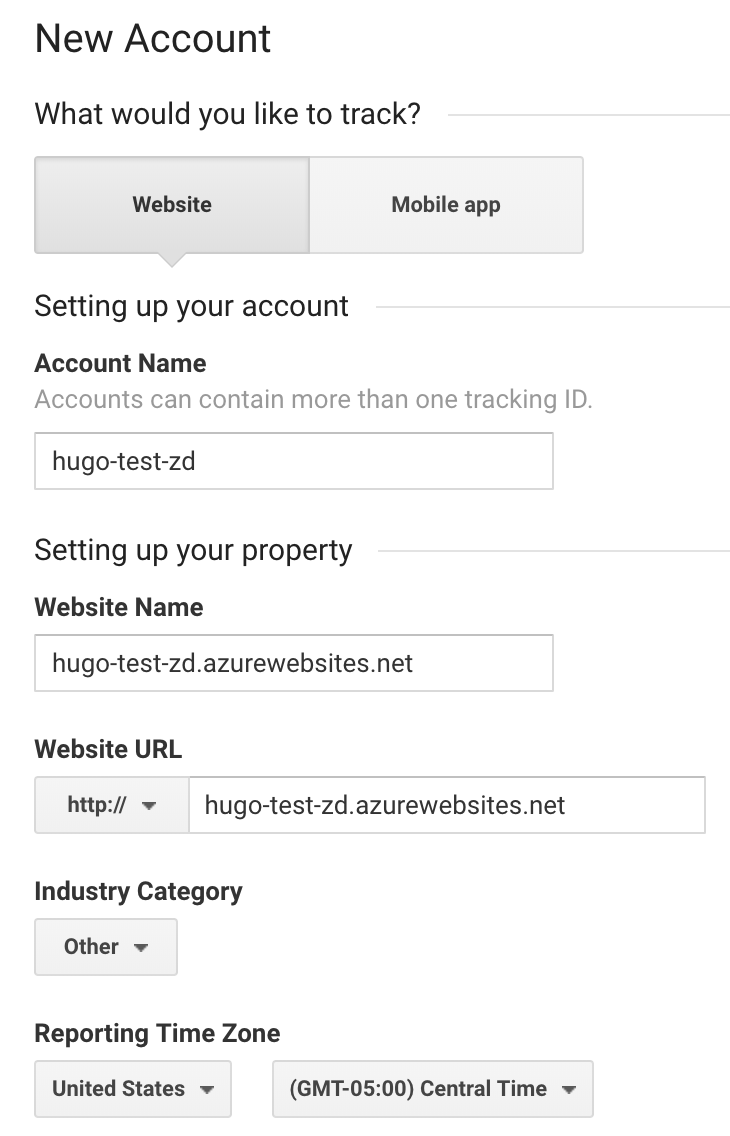
Configure the
New Account.Under
What would you like to track?, selectWebsite.Set an
Account Name.- I’m using
hugo-test-zdto match my Azure App Services Web App name.
- I’m using
Set your
Website Name.- I’m using
hugo-test-zd.azurewebsites.net, although this does not need to be the domain name itself.
- I’m using
Set your
Website URLto the domain you’re wanting to track.- I’m using
http://hugo-test-zd.azurewebsites.netfor this example.
- I’m using
Set the
Industry Categoryto the category that best describes what your site is for.- I’ve selected
Otherfor the purposes of this example.
- I’ve selected
Set your
Reporting Time Zone.- I’ve selected
United States(GMT-05:00) Central Timebeing I live in the Central Time Zone.
- I’ve selected
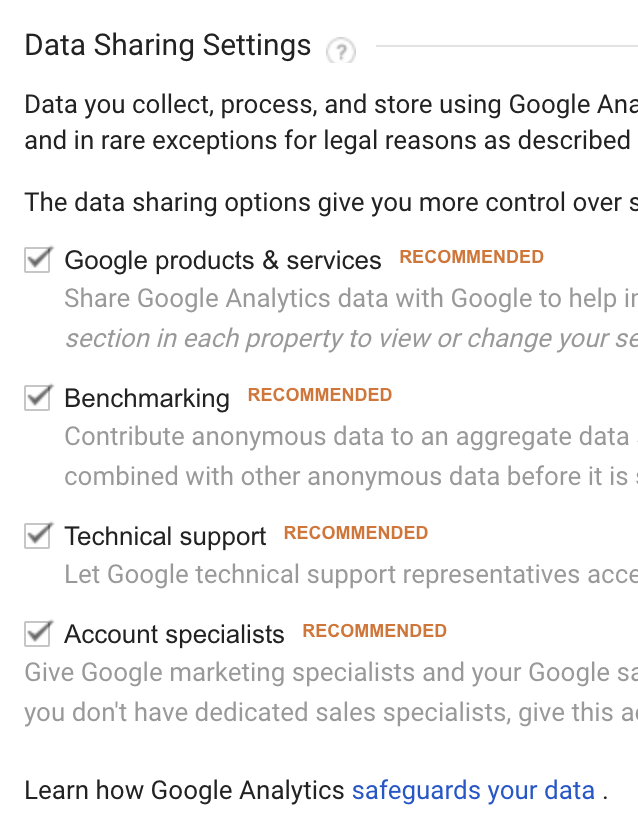
Set your
Data Sharing Settingsfor the new account.I’ve left everything checked by default for this example.
Feel free to make changes here if you’d like to.
Click
Get Tracking IDafter double checking your settings.
Read and accept the
Google Analytics Terms of Service Agreementby clickingI Accept.Only accept these terms if you agree to them but understand you can’t proceed unless you accept them.
You’ll need to also accept the
Data Processing Termsas required byGDPRbefore you can proceed.
Once you’re done, you’ll be taken to the Property page for your new Google Analytics Account and Property.
Step 2: Getting your Google Analytics Tracking ID for your Property
If you’ve just created your new Account and Property following this tutorial, you are likely on your property’s Tracking Code page already. If so, you’ll find your unique Tracking ID on this page. The tracking ID is in the format UA-123456789-1 and is unique for this property that you’ve created, so don’t share it!
If you’re not on this page already because your property already exists, or you navigated away from it, no worries! Let’s walk through finding that Tracking ID.
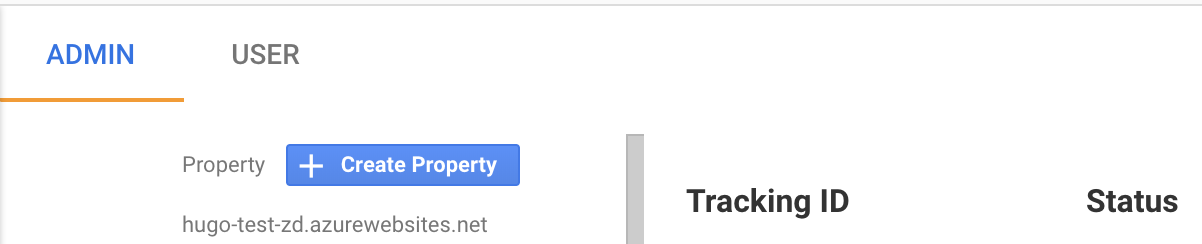
Head back over to the
ADMINpanel.On my dashboard, this is on the left navigation bar at the bottom just below
DISCOVER.Navigating to the
ADMINsection may differ for you depending on what state your Google Analytics account is in and how it’s configured.
Select the correct
Accountfor your site in the dropdown.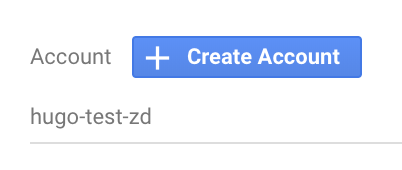
Select the correct
Propertyfor your site in the dropdown.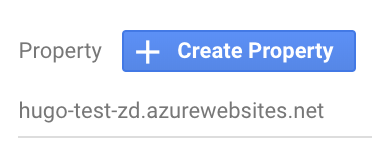
Under the
Propertysection, selectTracking Code.You’ll find this under
Tracking Infoin thePropertysection.Double check that you’re on the right property!
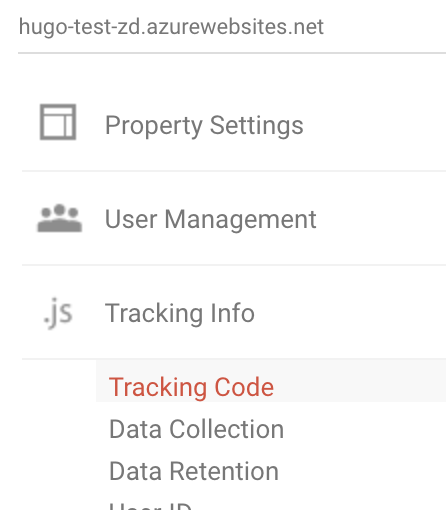
Locate the
Tracking IDfor your site.The tracking ID is in the format
UA-123456789-1.It is unique for this property - so don’t share it!
Copy or make note of the
Tracking ID.
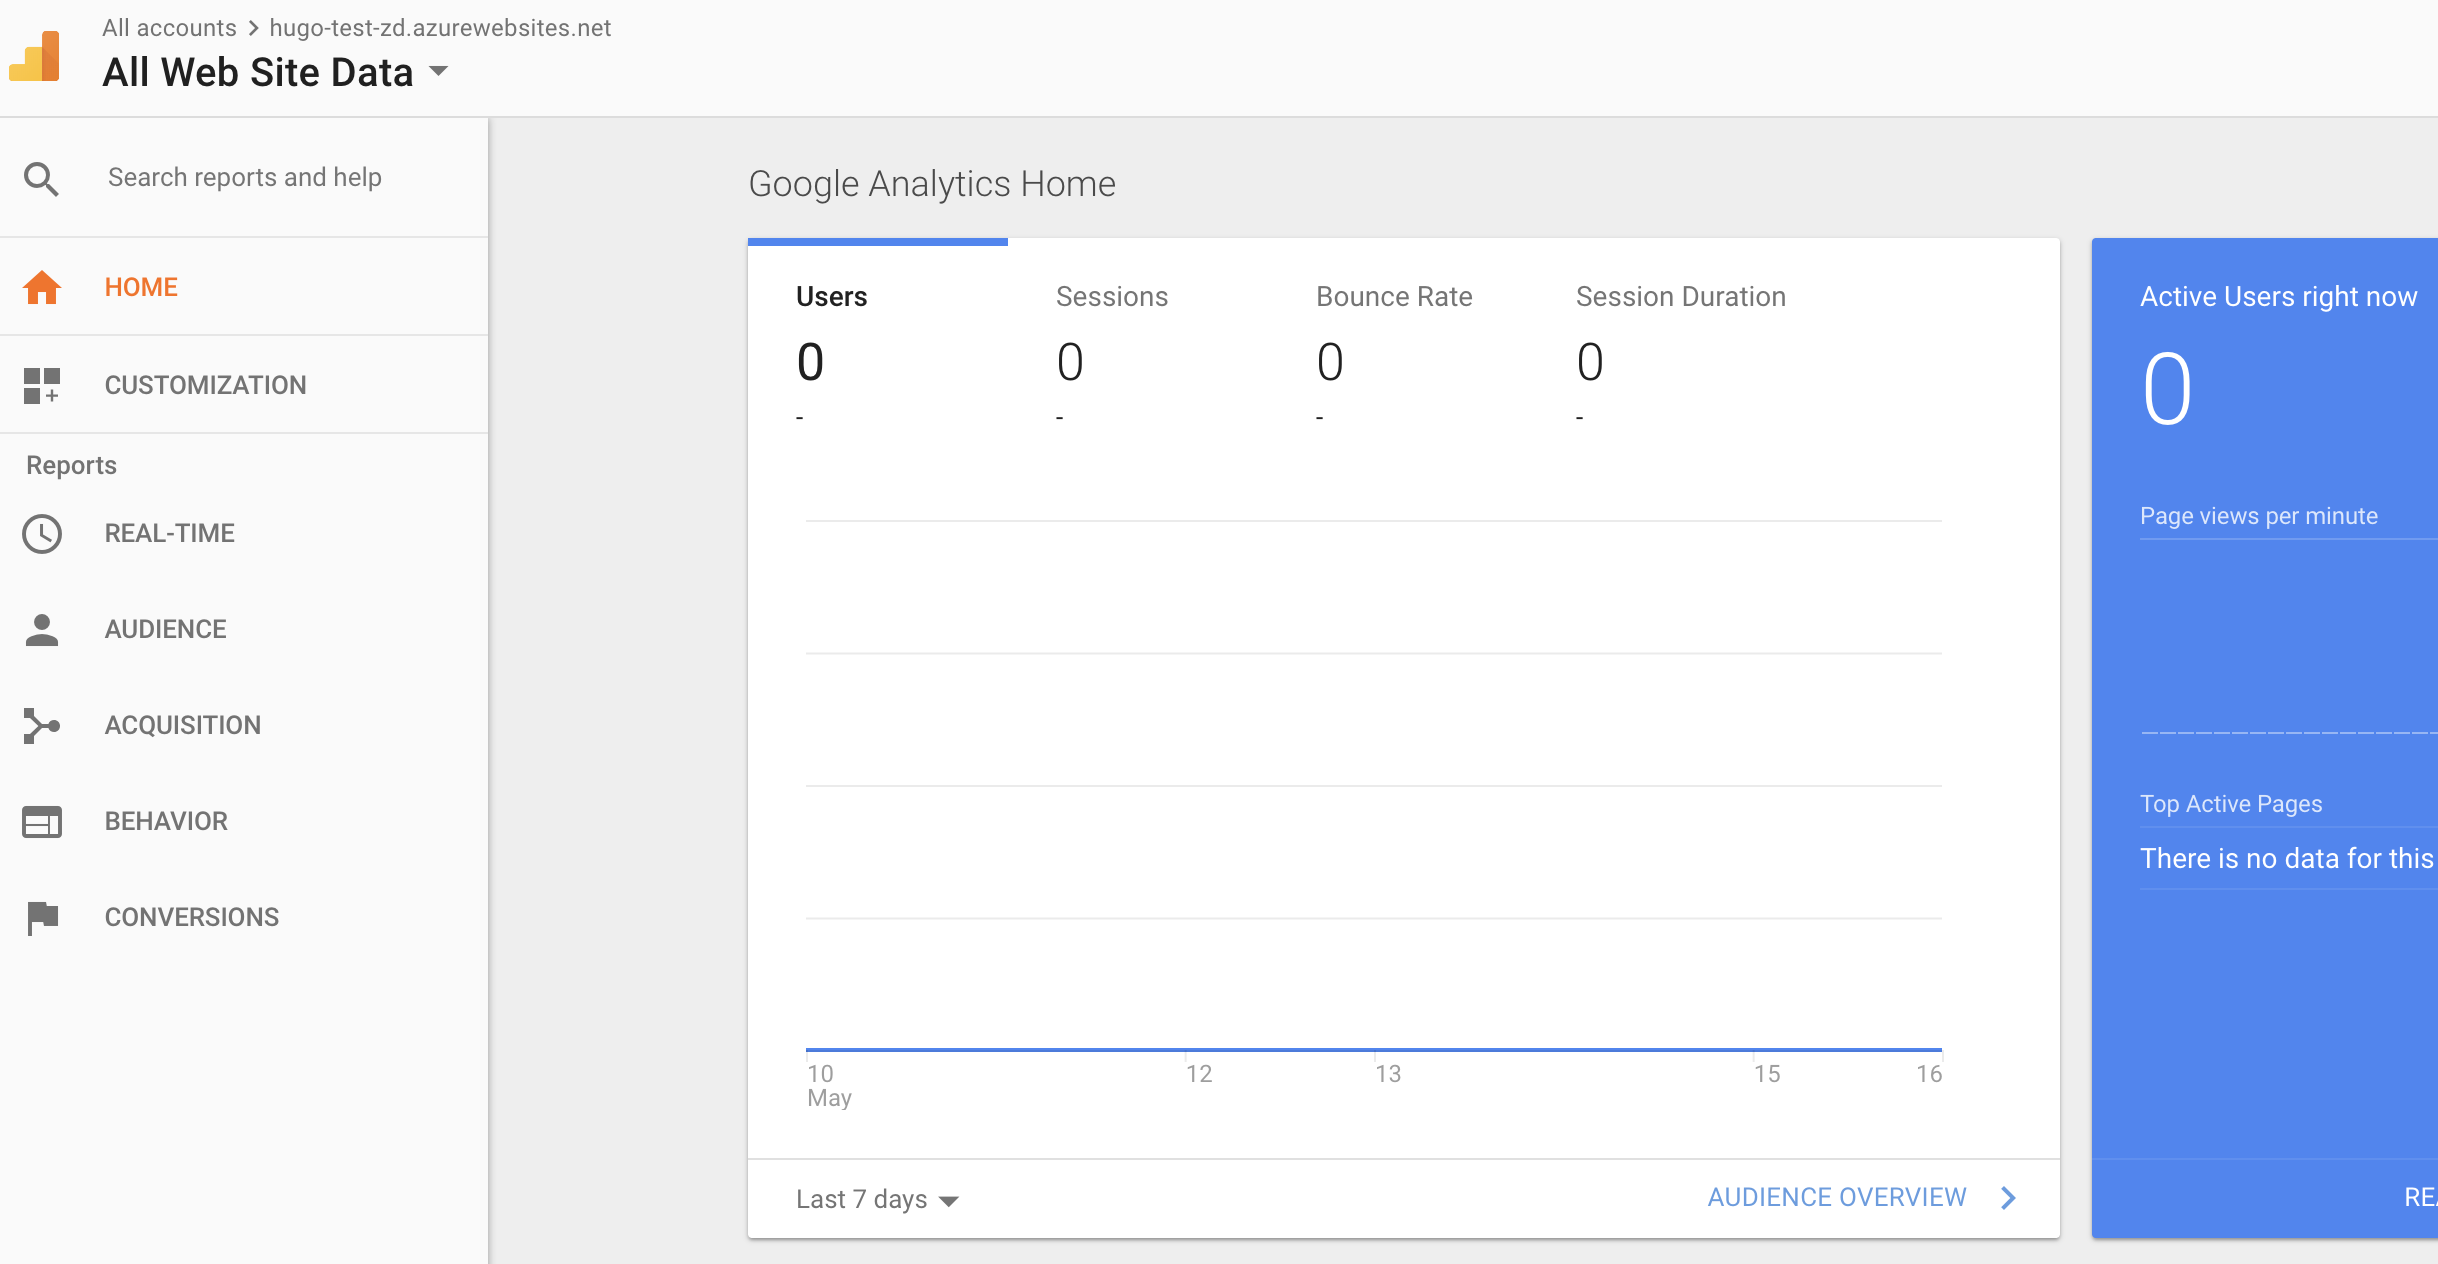
That’s all there is to it! We now have the Tracking ID for our site. If you browse to HOME for this property in your Google Analytics dashboard, you’ll see that there is no current usage data reflected being it’s not yet configured in Hugo to report this data.
We need that data to be reported, so let’s go configure Hugo to report it using our Tracking ID!
Setting up Hugo to use Google Analytics
Step 3: Configure Hugo to use your Google Analytics Property Tracking ID
This is the step I had already done on my own personal blog. What we need to do is tell our Hugo site about our Google Analytics Tracking ID, that way it knows where to send the tracking data. Let’s get to it!
NOTE: I’m using Visual Studio Code as my editor. If you haven’t already tried it out, I’d highly recommend it! It’s lightweight, it’s FREE, it’s open source, and it runs everywhere. It also has a very active marketplace of awesome extensions to optimize your code-writing experience!
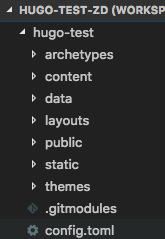
Before we dive into the simple change I need to make, here is a quick look at the directory structure of my HUGO-TEST-ZD workspace inside Visual Studio Code.
I’m using config.toml for my Hugo configuration. Let’s add that Tracking ID!
Open
config.tomlfor editing.Locate the
googleAnalyticsvariable in yourconfig.tomlfile and set it to yourTracking IDfor your Google Analytics Property.For the
hugo-classicHugo theme, this line already existed as a blank variable.If your
config.tomldoes not have agoogleAnalyticsvariable, add one.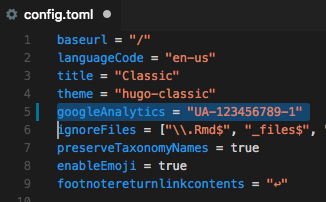
Save your changes and close the
config.tomlfile.
That’s really all you have to do to set the Google Analytics Tracking ID in Hugo. However, your site will not automatically start sending tracking data to Google Analytics unless you specifically tell Hugo to use its Google Analytics Internal Template. Onto the final configuration step!
Step 4: Configure your site to use Hugo’s Internal Template for Google Analytics
While this is not usually enabled by default, it’s important to note that some Hugo themes may have this configured to work automatically depending on whether or not the googleAnalytics variable contains a value. If that is the case, the site may start to report traffic data to Google Analytics once you’ve set your Tracking ID and pushed your changes.
I would highly recommend checking the documentation for the Hugo theme you’re using to make sure it’s not configured by default to use the internal Hugo template for Google Analytics reporting before continuing. If it’s configured to use it by default, you are done configuring and can skip this step!
The hugo-classic Hugo theme that I use did not have the template enabled by default at the time of writing this. Let’s tell it to start using that nifty internal template!
QUICK NOTE: I’m going to configure this in the header.html for my site so it works on every page of my site. Adjust where you configure it as necessary for your own site’s needs.
Let’s take a look at the directory structure for a typical Hugo site.
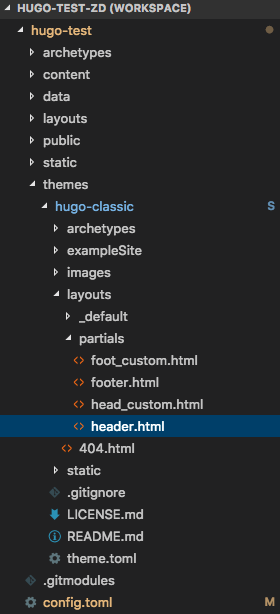
You’ll see the config.toml file we edited earlier at the bottom there. The M to the right of that filename and highlighted color you see is Visual Studio Code throwing me a visual cue, so I know that I have modified this file but have not yet staged those changes to my repository. You’ll also notice the hugo-classic theme folder in a highlighted blue with an S to the right of it indicates that folder is actually a git submodule. Have I mentioned I love Visual Studio Code yet? :D
You can see there are folders for public and static content in this directory structure among other things, but I want you to pay attention to some similarities in the root directory structure and the directory structure of my hugo-classic theme folder. Some of those folders are similar - most importantly in the case of this tutorial is the layouts folder that I’ve already expanded under the hugo-classic theme in the screenshot above.
The layouts folder holds .html templates that specify how your content will be rendered for your static website. Under this folder, you can see there is a folder called partials. That folder contains partial templates. These are smaller, context-aware pieces of your templates that can be reused to keep your code clean. This is where you’ll find the header.html file that we’re looking for!
Now, being my hugo-classic theme folder is actually a git submodule that I cloned directly from the hugo-classic theme GitHub repository, I don’t want to edit any files under that folder directly. If I were to edit files there, I would have uncommitted changes to my git submodule, and that can become a pain to manage being the submodule is not based off of a repository I own or want to commit changes to. If I was ok with having an unclean submodule, I could edit there directly - but we have an alternate route that will keep things clean… so let’s take it!
The way Hugo handles partials is that it looks in two places in a specific order to figure out what needs to be used. That order is:
1. layouts/partials/*<PARTIALNAME>.html
2. themes/<THEME>/layouts/partials/*<PARTIALNAME>.html
So, what does that mean for us? That means we can create a copy of the theme’s header.html file, throw it in our layouts/partials/ folder in the root of our Hugo site, and it will override the header.html file in our theme’s layouts/partials folder without overwriting it. Powerful stuff!
Once we have that new header.html file, we can add the code to it that will enable the internal Hugo template for Google Analytics on our site without disturbing the source code of the theme. Let’s do that and save ourselves some headache!
Make sure the
layoutsfolder in the root of your site contains apartialsfolder. If it does not, create it.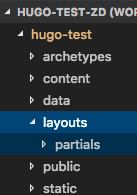
Copy the
header.htmlfile from your theme to your site’s rootlayouts/partialsfolder.- Copy the file at
themes/<YOURTHEME>/layouts/partials/header.html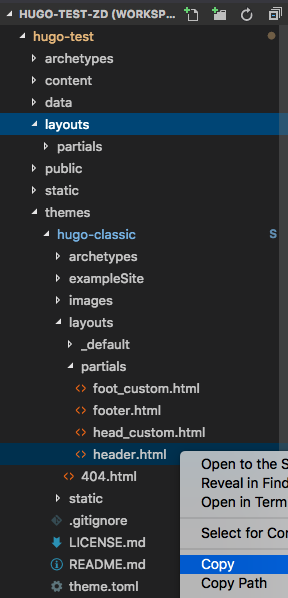
- Paste the duplicate to
layouts/partials/header.html
- You should end up with a duplicate of your theme’s
header.htmlfile in your site’s root folder underlayouts/partials/header.html.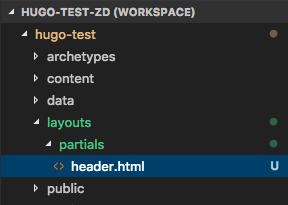
- Copy the file at
Enable the Hugo Internal Template for Google Analytics in your new
header.html.- Open the
layouts/partials/header.htmlfile we just created for editing. NOTE: Yourheader.htmlfile may look completely different if you’re not using the same version of the same theme I am running.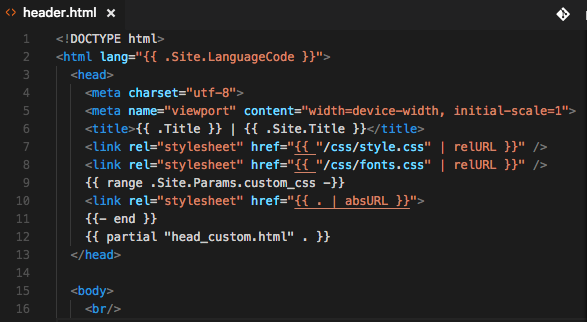
- Add
{{ template "_internal/google_analytics.html" . }}to yourheader.htmlfile to enable the internal Hugo template. NOTE: I’ve added this inside my<head>just before the</head>tag. Place it where you need if this won’t work for you.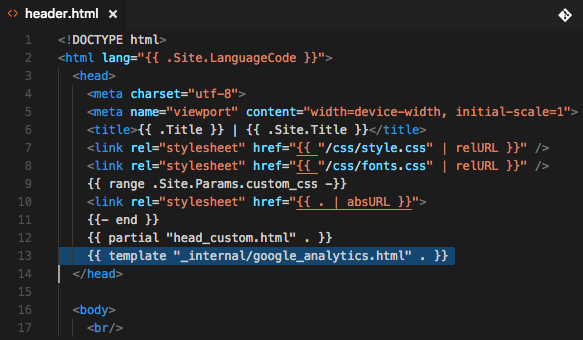
- Save and close the new
header.htmlfile you’ve edited.
- Open the
We’re done with the changes that need to be made!
Success!
Step 5: Let’s test our changes
Now that we’ve configured Hugo to push traffic information to Google Analytics with the Tracking ID we configured, let’s make sure it’s working! If you recall earlier, our dashboard in Google Analytics for this property was showing no traffic to the site. Let’s test out our changes and make sure Google is getting traffic information.
You can test this easily in two ways using Hugo. One option is to run Hugo’s local lightweight server locally on your computer and watch the Google Analytics dashboard as you click around. Another is to generate your static content in Hugo and push your changes up to make them live on your site wherever it lives to test it there. I highly recommend running hugo server locally and testing before ever rendering your static content or pushing it to your live site, but the latter may be completely acceptable if this is a test site or not yet a live/production site.
I’m going to kick off a hugo server in my terminal inside of my hugo-test folder where this site’s content lives. Let’s go through these steps real fast.
I’m going to assume you’re already familiar with the hugo command and its options and that you’re already inside of a terminal on a Mac. I’m going to use the Integrated Terminal in Visual Studio Code for these steps as well, but a regular terminal is fine if that’s what you prefer.
Make sure you’re in the root directory for your Hugo site.
- You can run
pwdto check what folder you’re currently in if needed.
- You can run
Run
hugo serverin the terminal.Note the host and port for the local webserver. This is usually
localhost:1313.NOTE: My local web server is running on
localhost:52951because port1313was not available.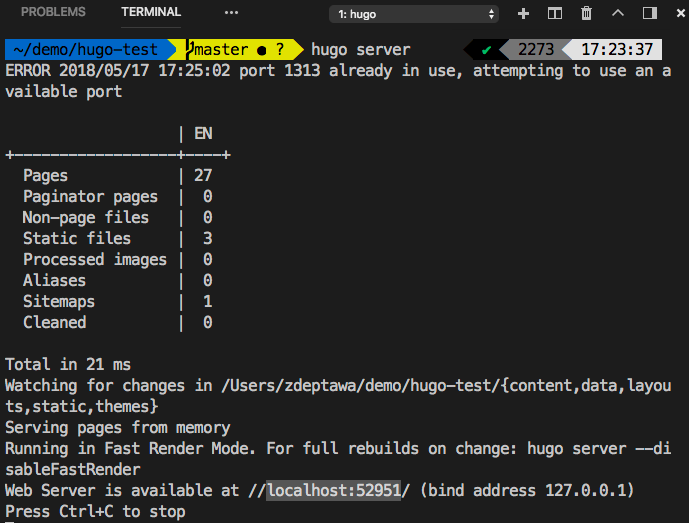
Use a browser to navigate to the host and port you noted when you started the
hugo server.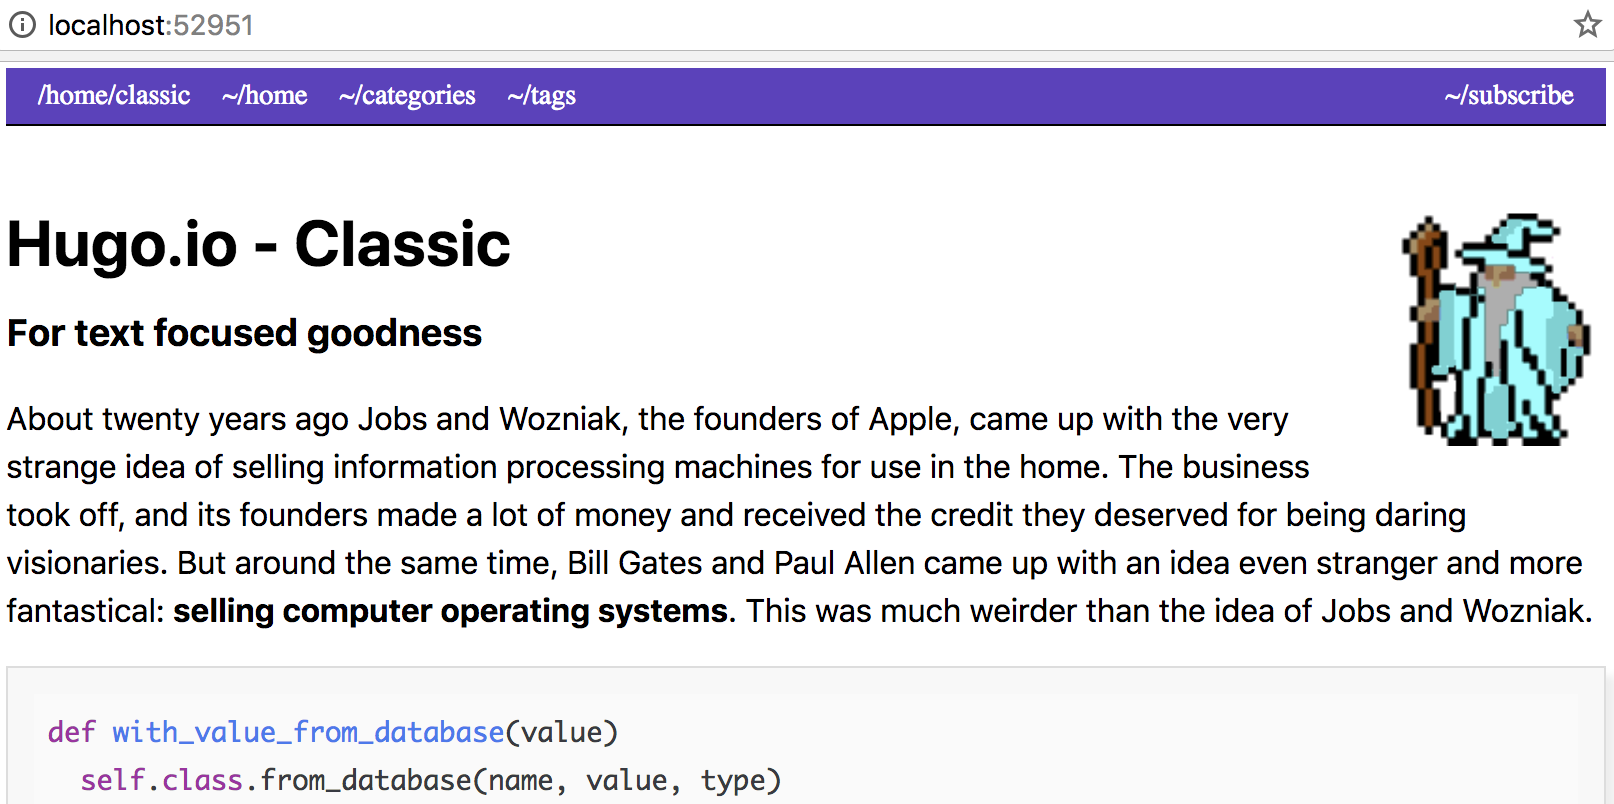
Head to your dashboard at
https://analytics.google.com.- Make sure you’re on the right
AccountandPropertyfor your site.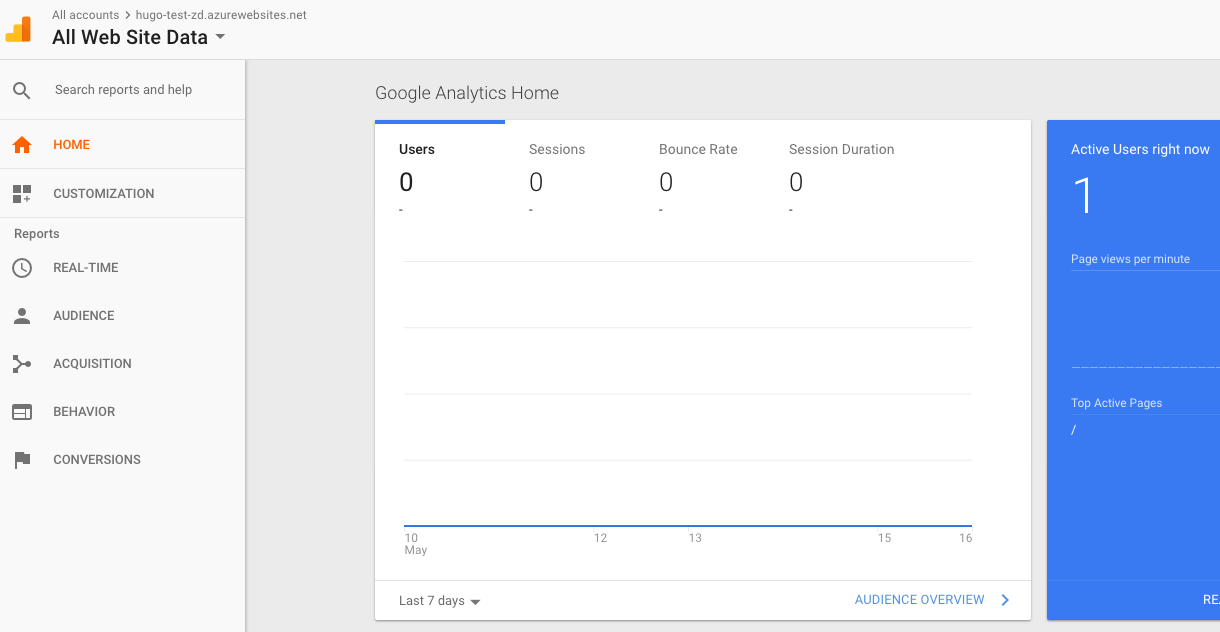
- Make sure you’re on the right
Did you notice anything on that page? Let’s look a little closer…
YES! We did it!
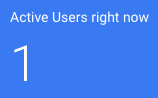
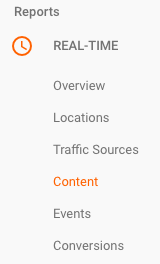
We have Google Analytics reporting one active user on the site right now being I’m testing it locally. You may show more than one active user depending on how you’re testing it. Let’s drill into the stats a bit more. Click on REALTIME under the Reports navigation header on the left and then click on Content.
You should be seeing a screen that looks similar to this one, depending on the version of Google Analytics that is out at the time you’re testing this.

Near the bottom of this Realtime Content Dashboard, you can see some pretty interesting stuff - like what pages your users are currently active on. Let’s take a look at what pages are currently open and active for people viewing this site (which is currently just me for the purposes of this example).

Now, click on some other page in your browser on this site you’re testing. I’ve navigated to the /categories/ page on my test site.
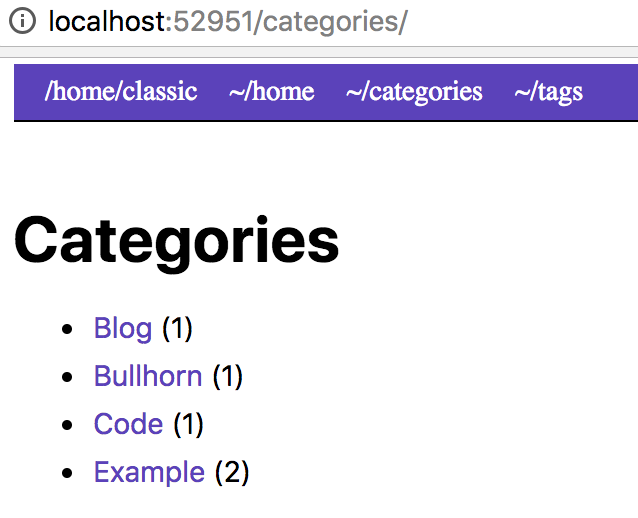
Let’s check the Active Page section now under the Realtime Content Dashboard in Google Analytics.

So, my Hugo site is now tracking the traffic that hits it properly! When my pages load, the header now calls the internal Hugo template to send information about my browser session to Google Analytics using my unique tracking ID for this site. Google Analytics then processes that information and displays it in near-real-time for me to view in the dashboard. It’s also going to store this data, so I can review traffic patterns over time and react to them if necessary. That’s pretty awesome!

Let’s recap.
Alright, you did it. You made it through this tutorial, and I love you for it. What did you actually accomplish?
1. You set up your Google Analytics Account and Property for your site.
2. You located the unique Tracking ID for your site.
3. You added your Google Analytics Tracking ID to your Hugo site's config file.
4. You overrode your site's header file without bothering the theme's source.
5. You enabled the internal Hugo template for Google Analytics.
6. You saw the traffic being reported to the dashboard in near-real-time.
7. You were awesome!
I’d say that’s pretty sweet. =]
What now?
If you haven’t already, get your code pushed up and tested where your site resides. Make sure you follow best practices for doing so if this is a live production site that you’re editing. If you haven’t already configured any version control, I’d recommend considering it! It will make your life so much easier in the end for tracking changes to your codebase.
If you want to learn more about Internal Templates on Hugo you can do so here.
You can also set up some DevOps magic to automatically build your site based on things that happen in your repository. If you want to skim through my Running Hugo on Azure App Services with VSTS Tutorial, it covers the entire process to do this using Azure App Services and Visual Studio Team Services in an automated fashion using continuous deployment.
Please shoot me a message or tweet @zdeptawa if you want to chat about any of this or if you have any questions. Have a great day, and thanks for checking this tutorial out!